Azure DevOps CI/CD
In this blog post, you can learn how to create a continuous integration release pipeline (CI) and deploy the published build to a Azure Webapp using continuous deployment (CD). The default VS2019 .Net Core WebAPI 'WeatherForecast' service is used In this example.
As a prerequisite you need to upload the source code to an Azure Devops repo.
Build and Publish
There's some controversy as some folks REALLY like the "classic" pipeline while others like the .yaml (Yet Another Markup Language, IMHO) style. .yaml doesn't have all the features of the original pipeline yet, but it's close. It's primary advantage is that the pipeline definition exists as a single .yaml file and can be checked-in with your source code. That way someone (you, whomever) could import your GitHub or DevOps Git repository and it includes everything it needs to build and optionally deploy the app. The .yaml file lives in the root directory of the application. The example below shows the configuration for build & publish:
Configuration for build & publish:
trigger:
- master
#for image where app is built we are using a windows VM with VS2019 installed on it
#because using a windows-2019 vm image no needed to also install .net core libraries
pool:
vmImage: 'windows-2019' #other vm's are available
variables:
buildConfiguration: 'Release'
steps:
#because all nuget packages used are all publically available no need to do a nuget restore it is done automatically here
- script: dotnet build --configuration $(buildConfiguration)
displayName: 'dotnet build $(buildConfiguration)'
- task: DotNetCoreCLI@2
inputs:
command: publish
publishWebProjects: True
arguments: '--configuration $(BuildConfiguration) --output $(Build.ArtifactStagingDirectory)'
zipAfterPublish: True
# this code takes all the files in $(Build.ArtifactStagingDirectory) and uploads them as an artifact of your build.
- task: PublishBuildArtifacts@1
inputs:
pathtoPublish: '$(Build.ArtifactStagingDirectory)'
artifactName: 'myWebsiteName'
Publishing the CI build to a WebApp using CD
To start off you need to create a 'pipeline'. To do this click the Create Pipeline button, top right, then select the desired repo and follow the wizard to complete this task. Now you should be presented with your pipeline as in the image below:
Now you need to create a 'release pipeline'. To do this click 'releases' from the menu on the left, then 'create release' (top right). You will then be presented with a wizard as below:
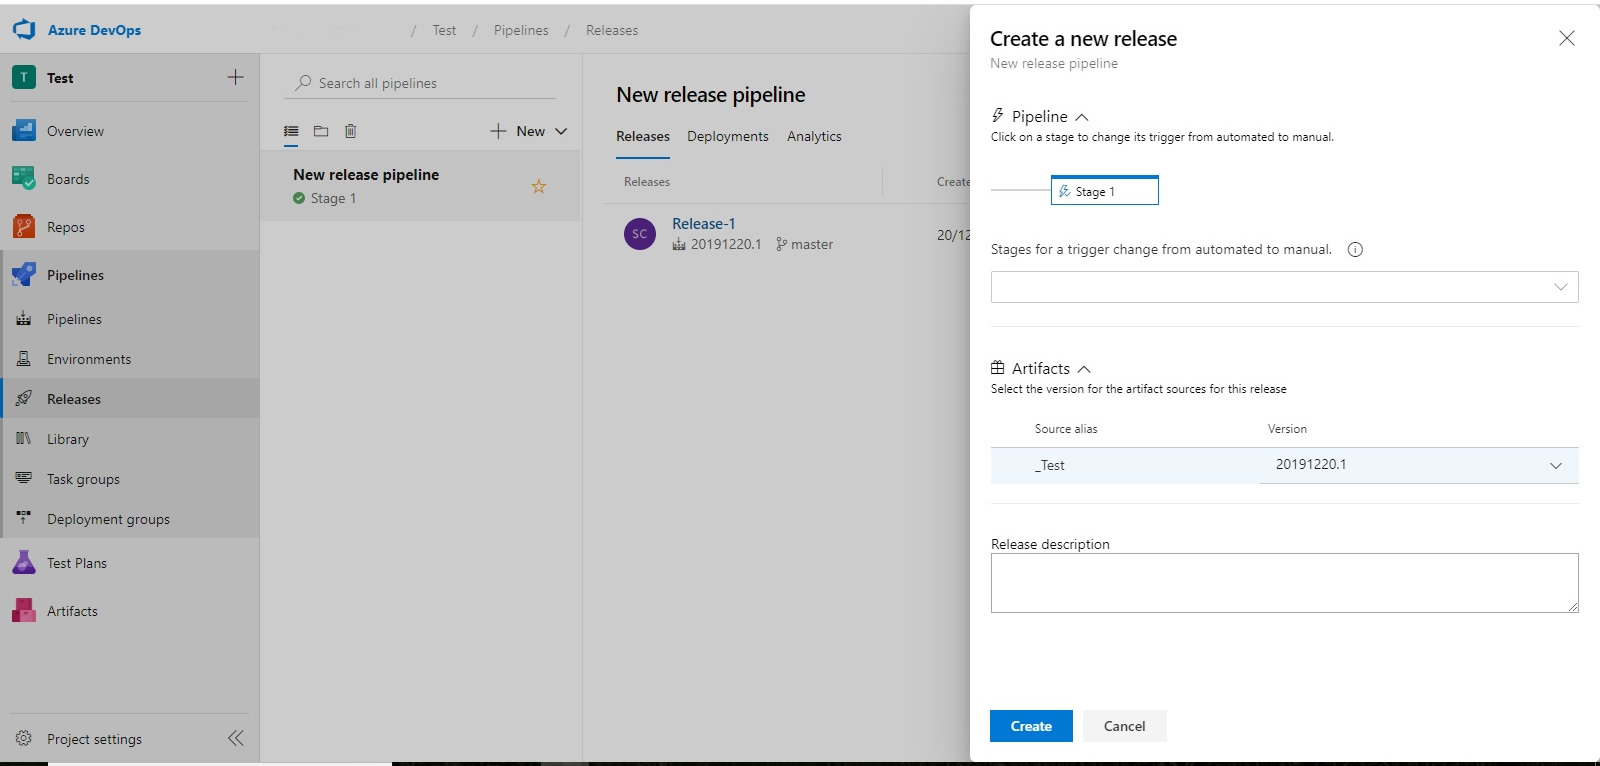
Select an 'artifact', which in this example this a branch and version of our code in the repo.
Now you will see a screen displaying the new 'release pipeline' as in the image below:
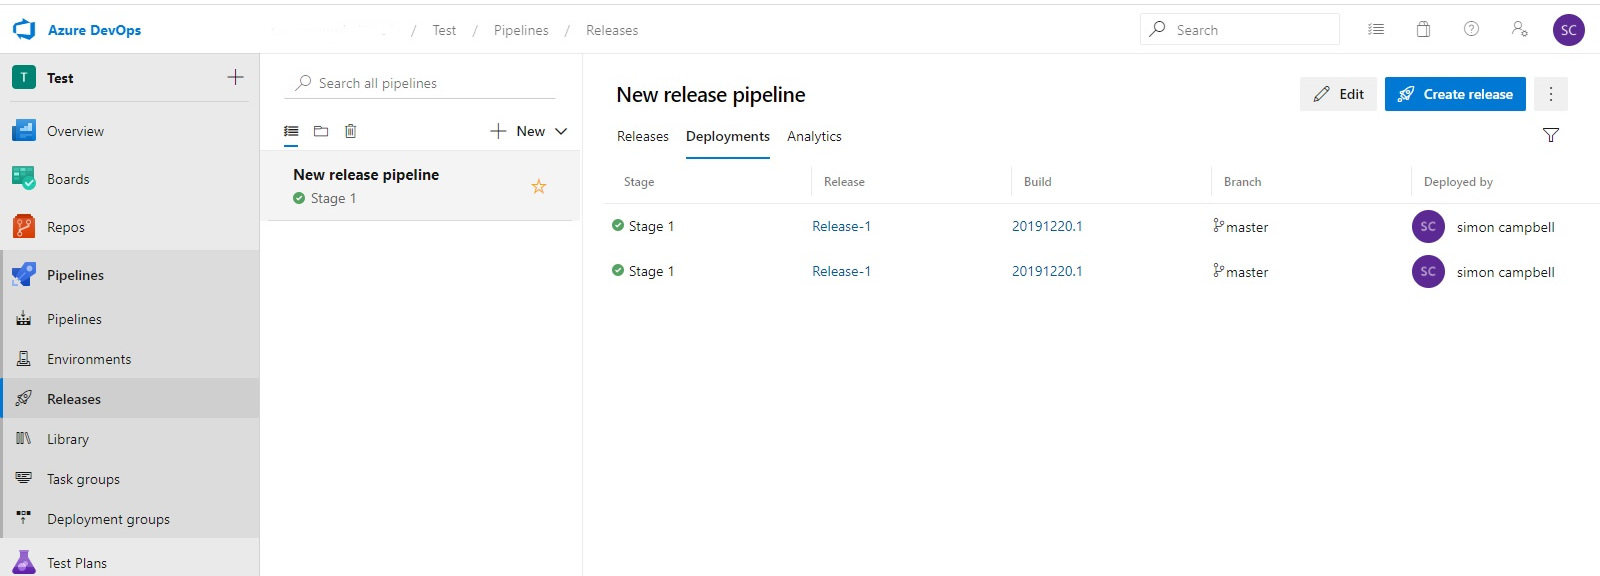
Now for this example, since the build and publish of our code is taken care of in the .yaml file in the root of our simple app source code. All we have to do is now deploy our published build to an Azure WebApp. To do this click 'Edit' (top right) after clicking on 'releases' from the 'Pipelines' menu.
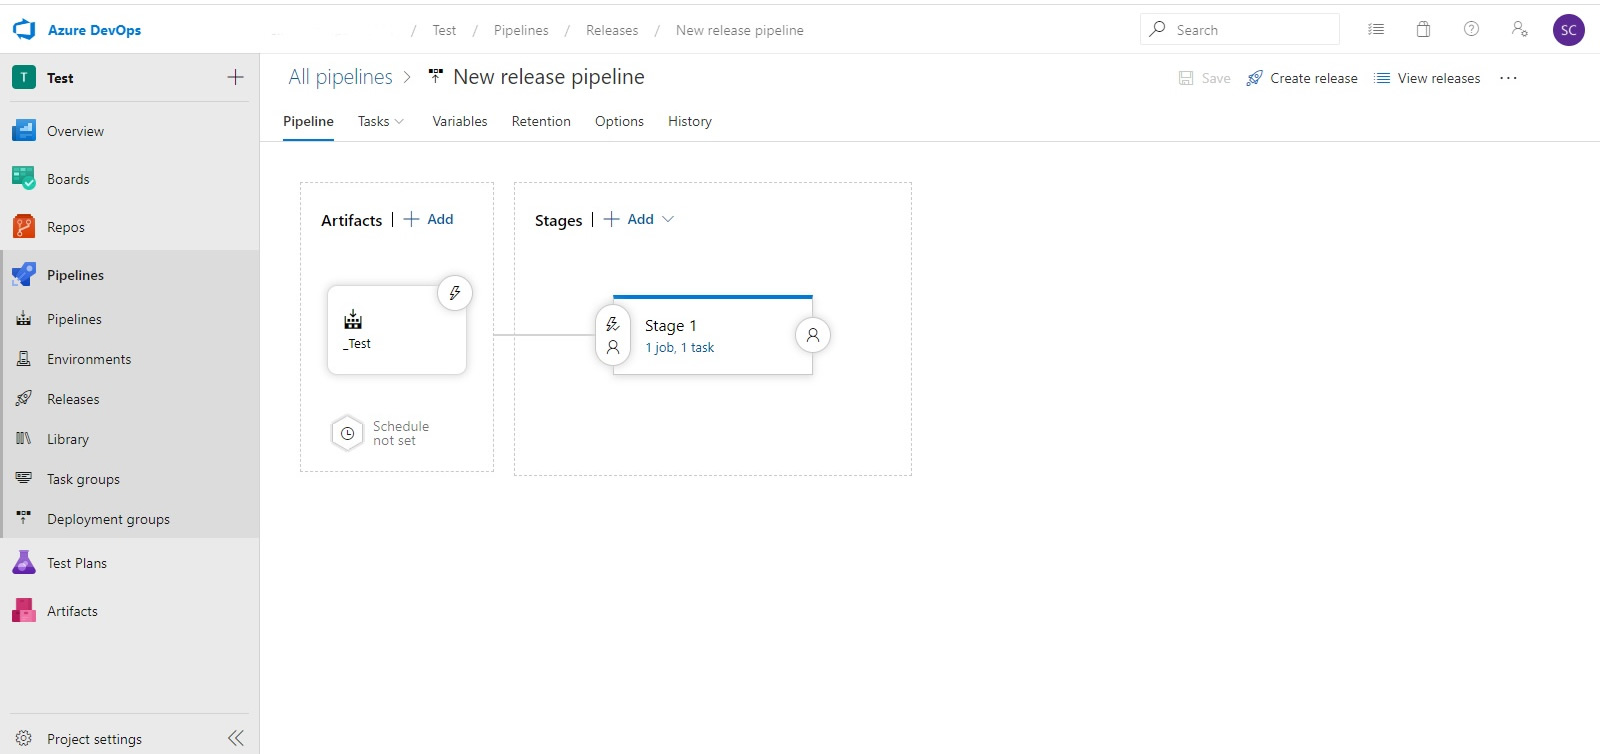
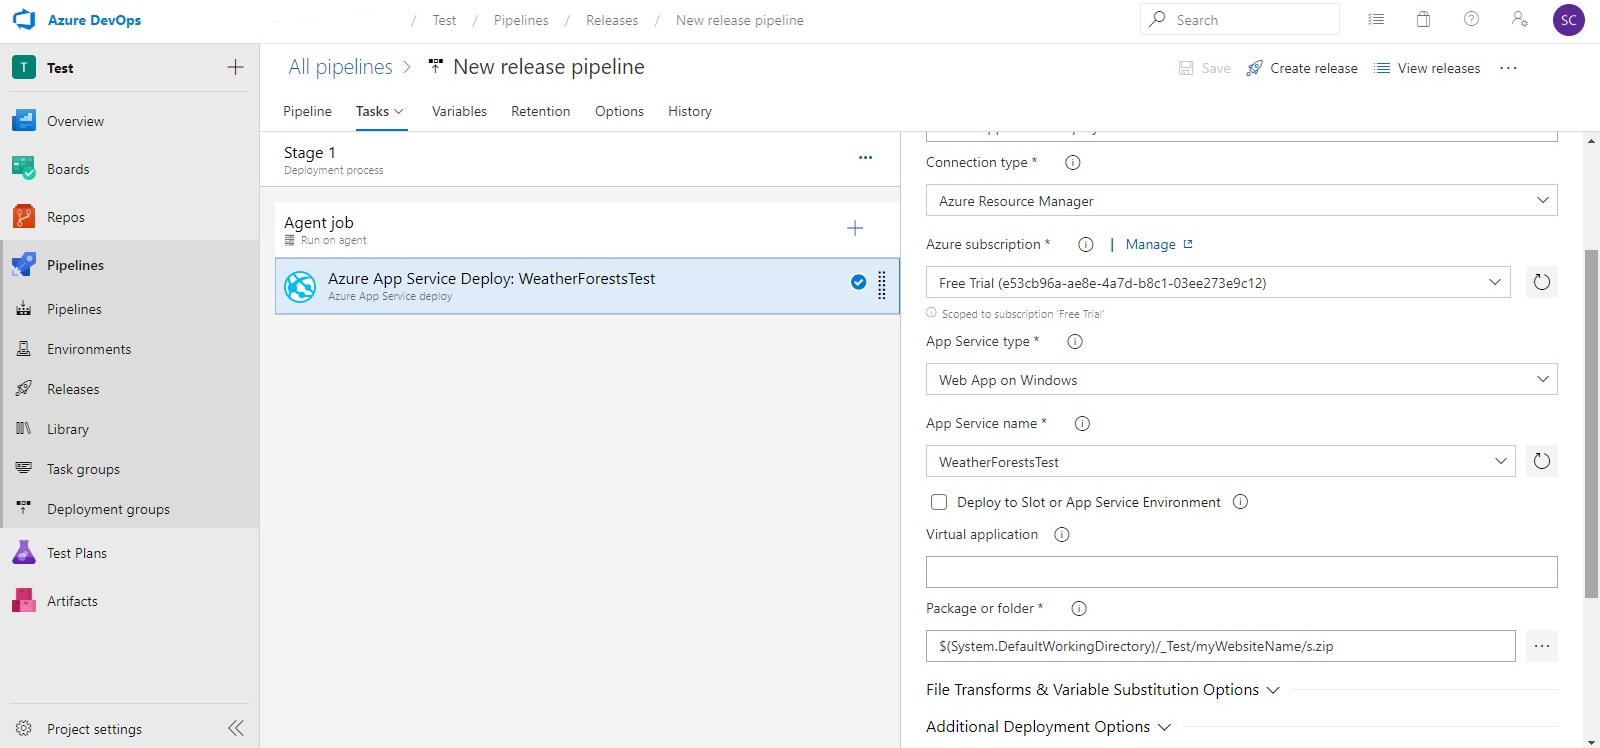
Then click on the 'task' link for stage 1. Now we can add predefined tasks by click the '+' button to the right of Agent Job. All we need for this simple example is the Azure App Service Deploy task.

Details of which should look like something those below, you can also click view .yaml (you are advised to save the contents for reference):-
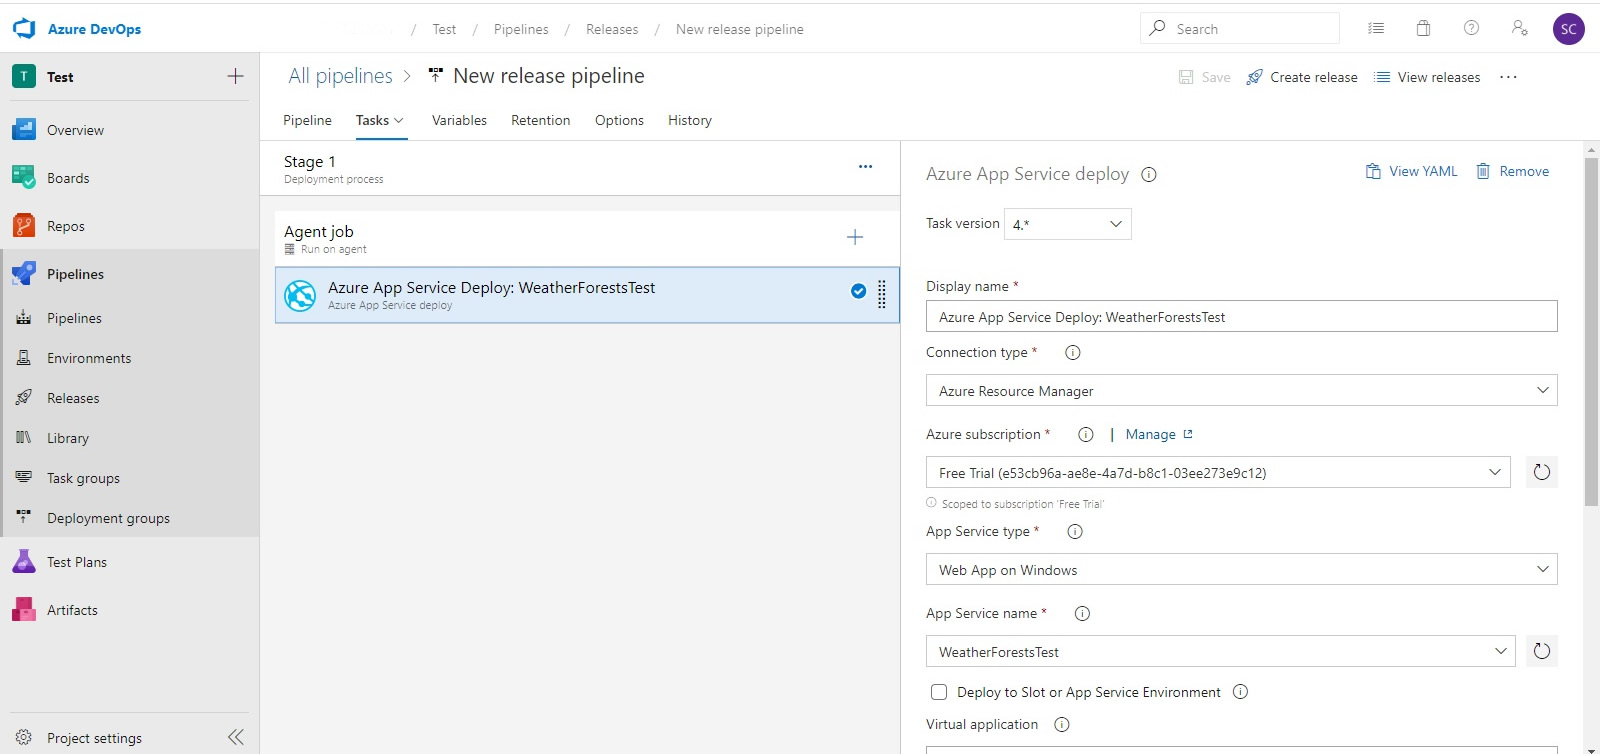
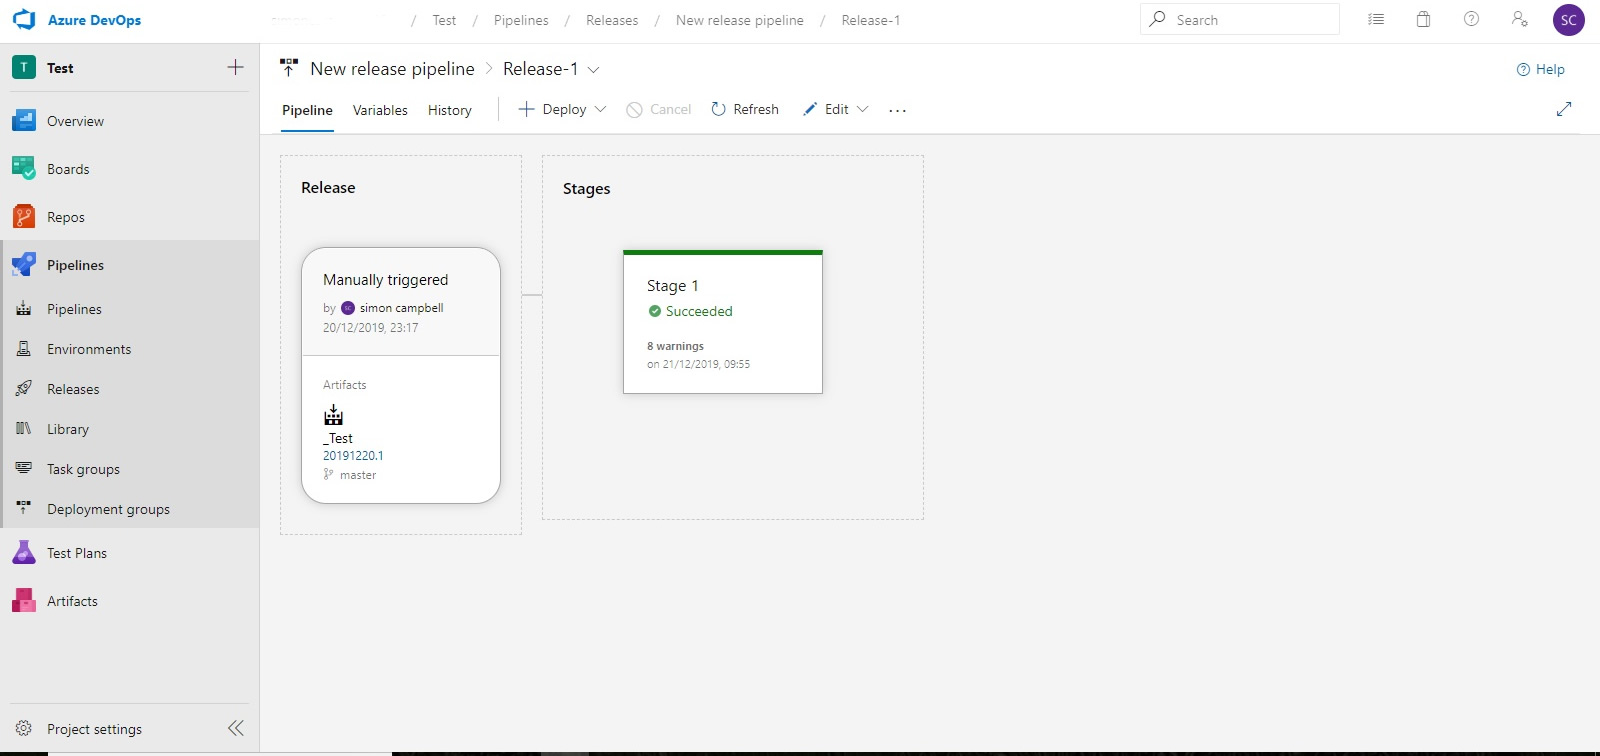
So now you are all set to deploy your release pipleline to an Azure WebApp. Now click on the release pipeline, hover over stages, in this case there is only one, and click deploy. Click on deploy and again on the pop-wizard and wait for the release to be queued, built and then deployed.
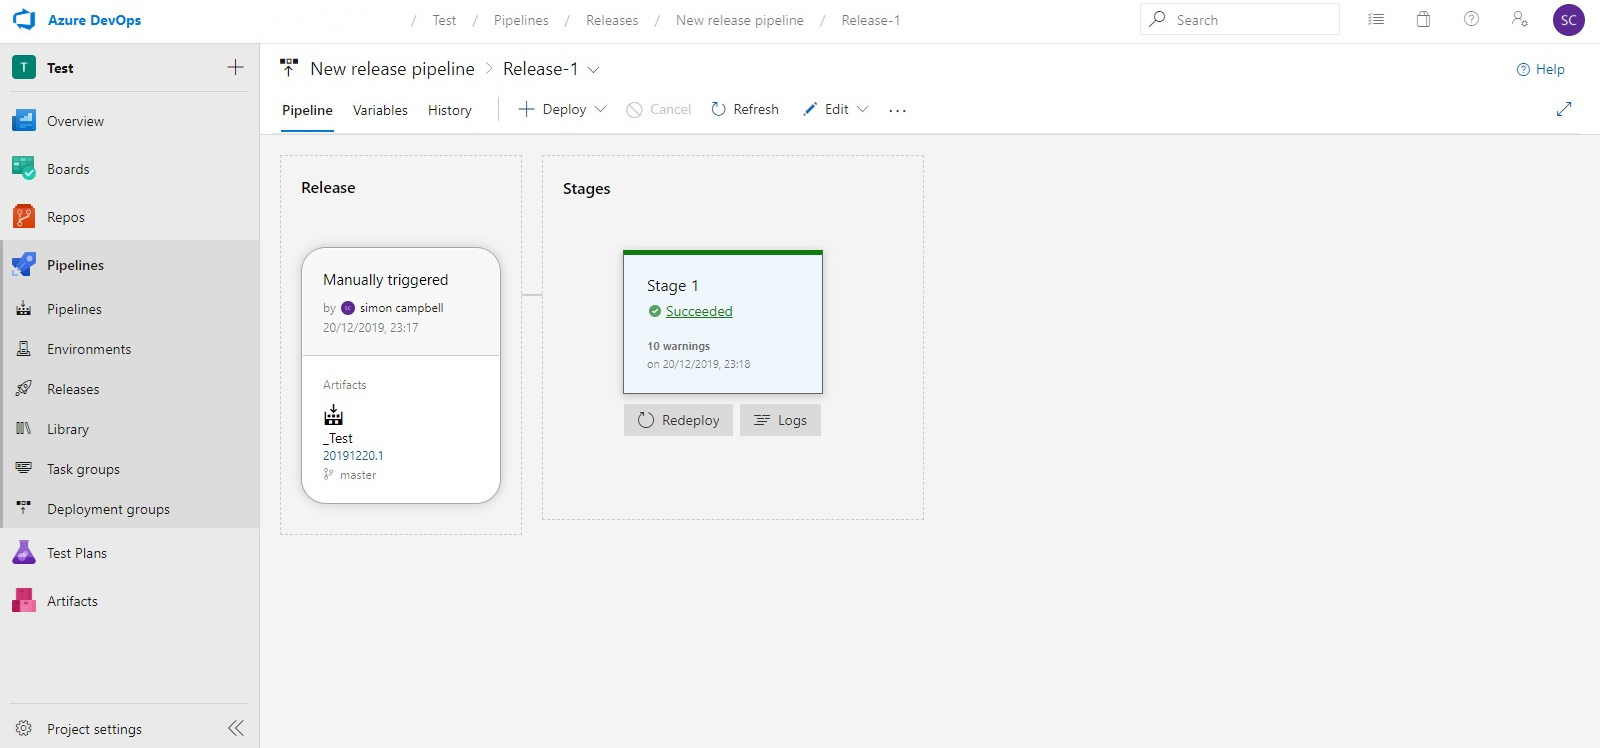
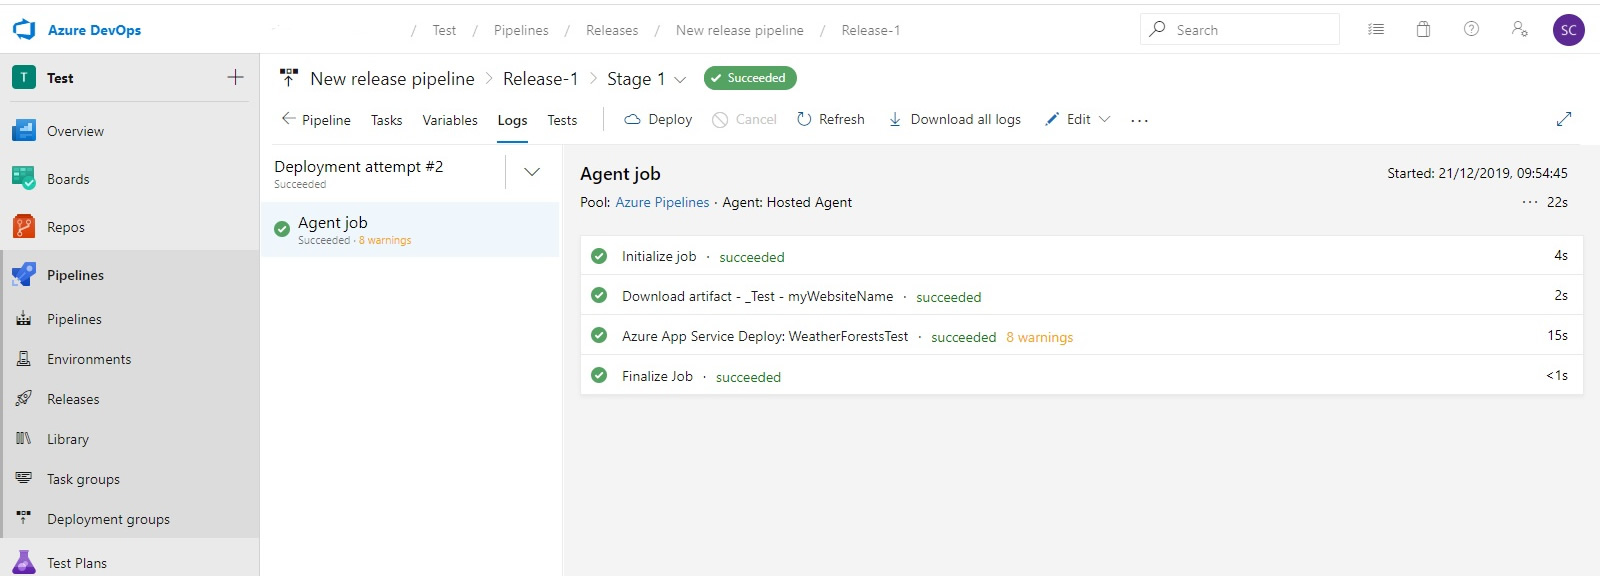
If all goes well you should get a Succeeded message under Stage 1. Click on the Succeeded message and you can see a list of all the job tasks and results.
Azure App Service Deploy task .yaml contents:
steps:
- task: AzureRmWebAppDeployment@4
displayName: 'Azure App Service Deploy: WeatherForestsTest'
inputs:
azureSubscription: 'Free Trial (e53cb96a-ae8e-4a7d-b8c1-03ee273e9c12)'
WebAppName: WeatherForestsTest
packageForLinux: '$(System.DefaultWorkingDirectory)/_Test/myWebsiteName/s.zip'
steps:
- task: AzureRmWebAppDeployment@4
displayName: 'Azure App Service Deploy: WeatherForestsTest'
inputs:
azureSubscription: 'Free Trial (e53cb96a-ae8e-4a7d-b8c1-03ee273e9c12)'
WebAppName: WeatherForestsTest
packageForLinux: '$(System.DefaultWorkingDirectory)/_Test/myWebsiteName/s.zip'